As spring planting season approaches in the Tri-Community, local residents can focus on the foundation of any successful garden: healthy soil. With a few practical steps, both beginner and experienced gardeners can improve existing beds or create new ones that support strong, productive plants throughout the growing season.
Steps for Amending Existing Beds and Establishing New Soil
Amending an Existing Garden Bed
To improve the soil quality in an established garden bed, begin by spreading a layer of compost or manure evenly across the surface. Gently work the organic material into the top few inches of soil. This process enriches the soil, increases nutrient availability, and encourages healthy plant growth.
Creating New Soil for a New Bed
When starting a new garden bed, first select a suitable location and clear away any grass or weeds. A common blend is to use approximately 40% topsoil, 30% compost or well-rotted manure, and 25% mix of 2 parts peat moss and coco coir and one part mix of vermiculite and perlite. This mix provides a balanced structure: topsoil offers body and minerals, compost or manure supplies nutrients and beneficial microbes, while peat moss, coco coir, vermiculite, and perlite improve water retention and aeration. Adjust the ratios slightly based on your local soil conditions and the needs of your plants. After the bed is turned and ready, use 5% mulch on top to keep out weeds.
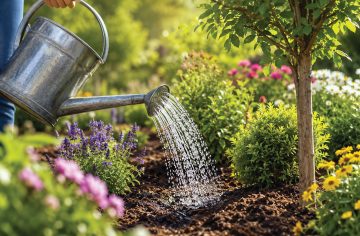
Watering and Planting Preparation
Before planting, water the bed deeply each day for a week to ensure your bed has no dry spots in the soil. This can help prevent plant shock. Always plant into a moist area and hydrate the plant before transplanting.
Solarizing the Garden Bed
To solarize a garden bed, cover the soil with clear plastic sheeting and secure the edges tightly. Leave the plastic in place for 4 weeks, which will trap heat and effectively kill weeds, pests, and many soil-borne diseases. Then remove the plastic before planting.